I started by leaving our little one with the hubs and heading off to Lowe's. By the way, for those of you who don't know this...I could stroll around Lowe's just for kicks any day! I got some Board and Batten instruction and inspiration from some very talented bloggers...you can check them out here and here.
I wanted the top of the Board and Batten to come just below our light switch which turned out to be 4' tall, which made the cutting easier....well, easier for the guy at Lowe's since I didn't actually do any cutting myself! :) Our baseboards aren't very thick and I didn't want the boards to stick out from the wall so much that they jutted way out over the baseboard, so I chose pine lattice wood that was 2.25" wide x 8' long. I got 3 of these boards and had them cut in half. The lattice wood was a little more expensive than if I had of chosen 1x4's but with such a small space I was able to spend a little more and still stay within budget...and the 1x4's would have stuck out from the wall too far for my taste so it was worth a few extra bucks. For the top of the board and batten, I got a 3.25" x 6' mdf door casing, and had to have an inch or two cut off so it would fit in the space perfectly. Both the lattice wood and the door casing were located in the door trim section at Lowe's. I'm sure "door trim section" is the technical term! :)
 I forgot to take a before picture, but here is a shot of the wall after I painted a coat of primer. And, yes, that is my sons post-lunch highchair tray...as you can see, he had some sweet potatoes that day!
 Here are the boards/lattice wood after I primed them.
 I placed the boards 16" apart because I wanted them to all be nailed into a stud since I wasn't using liquid nails or anything to help hold them on the wall. I put the boards up first and taped them in place so I could step back and make sure I liked how it looked before I nailed them in for good.
 All in place and ready to be painted...or so I thought...

 I had actually already started filling in the annoying little gap when I realized I should take a picture, so that's why the top part of the gap is somewhat presentable rather than that pesky little empty space that you see on the bottom part of it. And, I know what most of you are thinking, "Seriously, that tiny little space really isn't that big a deal...let.it.go!" Well, I just couldn't! When I stepped back from my hard work, it was like that little space was mocking me. So, I pondered for several minutes about how to fill it in. I knew using spackle would be pretty tough due to where this was located...trying to fill it in between the door frame and the casing with spackle seemed like I would have an uneven mess and would create another annoying little mistake to glare at me everytime I walked by. So, what's a girl to do....can you guess???? I grabbed our handy dandy toothpaste!! That's right...toothpaste!! I think it was arm and hammer paste to be exact but I'm sure any white paste-like toothpaste would work. It was perfect for filling in this little gap because I could easily squeeze some onto my finger, fill the gap, and then wipe off the excess. I'm sure a pro would have used silicone or caulk, but we didn't have any and I didn't want to make another trip to the store.
 And, here it is all filled in and pretty...much better!!
 Again...
 And, one final pic for good measure!! Who knew toothpaste could make a girl so happy! :)
I finished it off by setting the nails and filling in the nail holes with spackle for a smooth finish. Then I painted it all, which turned out to be a much bigger task than I anticipated, but I eventually got it finished.
 I actually found a before picture on my phone...I think I took it after painting out kitchen table. So, here is the space before.
 And, after.
 From the side.
 Here is what the lattice wood looks like against the baseboard...I like that it doesn't stick out any further than it does. 1x4s would have stuck out much further than I wanted.
Here is a breakdown of the supplies I used and the total cost:
Primer
Paint
Small nails
Hammer
Nail set
(I had all of these so they didn't cost any extra)
3 pieces of pine lattice wood at $8.10/each = $24.30
1 mdf casing at $8.19
6 pack of paint rollers at $8.97
total: $41.46 + tax
and I only used 1 of the rollers so I'll have extras for future projects!
Here are some things I would have done differently...or the "learn from my mistakes" part:
1. Having a nail gun would have made this much quicker. Nailing in each nail and then having to set each nail took quite a bit of time.
2. The casing came primed, and I didn't paint if before putting it up. Oh how I wish I had!! Since that was the piece that sat next to the wall, it would have been much easier had I painted it and then installed it. Then, I could have just touched up where the nails were. However, since I didn't paint it before installing it, I then had to paint it once it was already up, which caused me to get white paint on the brown wall. Once I had painted it white, I then had to go back over the brown where I had messed up. Anyways, it would have saved time to paint it before installing!
There you go! My first tutorial...and I hope it didn't create too much confusion!! Let me know what you think and if you have any questions.
Happy DIY-ing!!
I wanted the top of the Board and Batten to come just below our light switch which turned out to be 4' tall, which made the cutting easier....well, easier for the guy at Lowe's since I didn't actually do any cutting myself! :) Our baseboards aren't very thick and I didn't want the boards to stick out from the wall so much that they jutted way out over the baseboard, so I chose pine lattice wood that was 2.25" wide x 8' long. I got 3 of these boards and had them cut in half. The lattice wood was a little more expensive than if I had of chosen 1x4's but with such a small space I was able to spend a little more and still stay within budget...and the 1x4's would have stuck out from the wall too far for my taste so it was worth a few extra bucks. For the top of the board and batten, I got a 3.25" x 6' mdf door casing, and had to have an inch or two cut off so it would fit in the space perfectly. Both the lattice wood and the door casing were located in the door trim section at Lowe's. I'm sure "door trim section" is the technical term! :)


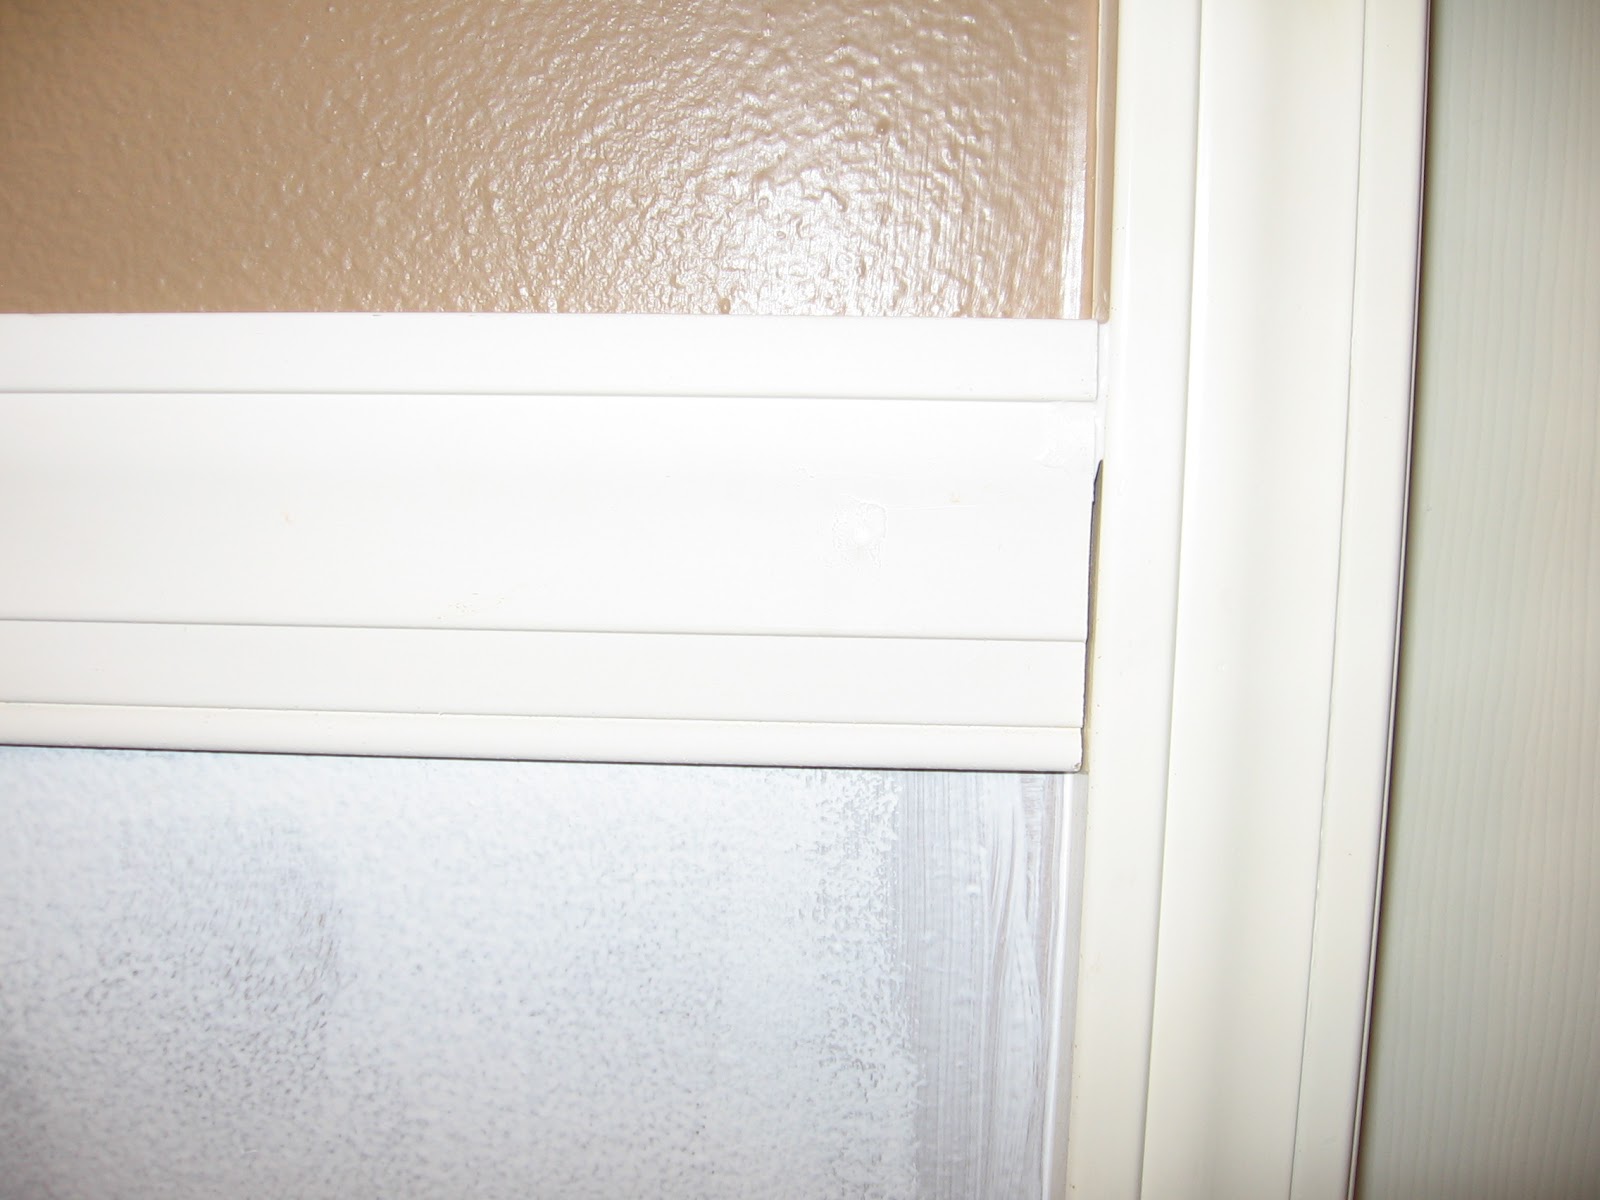
Do you see the gap between the door frame and the top of the casing???? Yikes!!


I finished it off by setting the nails and filling in the nail holes with spackle for a smooth finish. Then I painted it all, which turned out to be a much bigger task than I anticipated, but I eventually got it finished.


Here is a breakdown of the supplies I used and the total cost:
Primer
Paint
Small nails
Hammer
Nail set
(I had all of these so they didn't cost any extra)
3 pieces of pine lattice wood at $8.10/each = $24.30
1 mdf casing at $8.19
6 pack of paint rollers at $8.97
total: $41.46 + tax
and I only used 1 of the rollers so I'll have extras for future projects!
Here are some things I would have done differently...or the "learn from my mistakes" part:
1. Having a nail gun would have made this much quicker. Nailing in each nail and then having to set each nail took quite a bit of time.
2. The casing came primed, and I didn't paint if before putting it up. Oh how I wish I had!! Since that was the piece that sat next to the wall, it would have been much easier had I painted it and then installed it. Then, I could have just touched up where the nails were. However, since I didn't paint it before installing it, I then had to paint it once it was already up, which caused me to get white paint on the brown wall. Once I had painted it white, I then had to go back over the brown where I had messed up. Anyways, it would have saved time to paint it before installing!
There you go! My first tutorial...and I hope it didn't create too much confusion!! Let me know what you think and if you have any questions.
Happy DIY-ing!!
You are a professional! Looks so great Beka. Love your DIY tutorial too! I've been thinking about wainscoting (?) in our dining room...but maybe now I can try the board and batten thanks to you! Oh the DIY obsession can make one dizzy! Can we get paid for this? That'd be awesome!
ReplyDelete